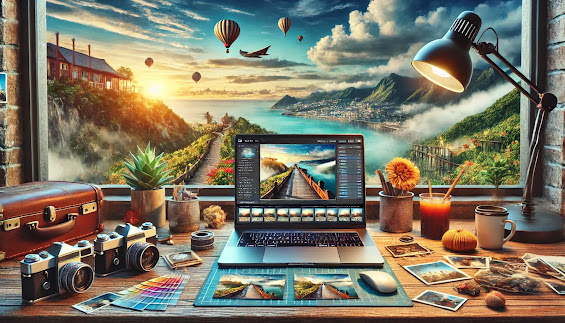
How to Edit Your Travel Photos for Social Media
Travel photos capture the essence of your adventures, but a bit of post-processing can elevate them to the next level. Editing your travel images for social media not only enhances their visual appeal but also ensures they align with your personal or brand aesthetic. This guide will walk you through the steps, tools, and techniques needed to create stunning social media-ready travel photos.
Why Edit Your Travel Photos?
Editing enhances the mood, colors, and clarity of your travel photos. It allows you to:
Highlight key details.
Correct exposure and lighting issues.
Create a cohesive theme for your social media profile.
With so much content online, well-edited photos help your posts stand out.
Best Tools for Editing Travel Photos
1. Adobe Lightroom
A favorite among professionals, Lightroom offers powerful tools for adjusting exposure, color, and tone. The mobile version is free with basic features.
2. Snapseed
This user-friendly app from Google includes tools for selective adjustments, healing, and filters.
3. VSCO
Known for its stylish filters, VSCO is perfect for quick edits that maintain a natural look.
4. Canva
Ideal for adding text, borders, or graphic elements for social media posts and stories.
5. Adobe Photoshop
Best for advanced edits like removing unwanted objects or creating composites.
Step-by-Step Guide to Editing Travel Photos
1. Start with a Great Shot
Editing can only enhance what’s already there, so start with a well-composed, well-lit photo. Shoot in RAW format if possible to retain maximum detail for editing.
2. Crop and Straighten
Why: To improve composition and focus on the subject.
Use the rule of thirds to position key elements.
Straighten horizons to maintain balance in landscape shots.
3. Adjust Exposure and Contrast
Exposure: Brighten underexposed photos or tone down overly bright ones.
Contrast: Enhance differences between light and dark areas to add depth.
4. Enhance Colors
Saturation: Boost colors, but avoid oversaturation to keep it natural.
Vibrance: Adjust subtle tones without overpowering the image.
White Balance: Correct the color temperature to make warm tones warmer or cool tones cooler.
5. Sharpen and Reduce Noise
Sharpen your photo to enhance details, especially for landscapes or architecture.
Use noise reduction sparingly to avoid a blurry appearance, especially for nighttime or low-light shots.
6. Use Filters or Presets
Filters and presets can give your photos a consistent look.
Create custom presets in Lightroom to save time and match your style.
7. Edit Selectively
Use tools like radial filters or brushes in Lightroom or Snapseed for targeted adjustments.
Brighten faces, emphasize skies, or highlight key details without affecting the whole image.
8. Remove Distractions
Use the healing tool in Snapseed or Photoshop to remove unwanted objects, blemishes, or lens spots.
Clean backgrounds can make your subject pop.
9. Add Final Touches
Vignettes: Draw attention to the center by darkening the edges.
Borders: Add white or colored borders for Instagram posts.
Text: Include location names or captions using Canva or Photoshop.
Creating a Cohesive Instagram Feed
1. Stick to a Color Palette
Choose tones that complement each other, like warm neutrals, pastel shades, or vibrant colors.
2. Use Similar Filters
Apply the same preset or filter to all your photos to maintain consistency.
3. Plan Your Grid
Use apps like Planoly or Preview to organize your feed and ensure your posts flow seamlessly.
Dos and Don’ts of Editing for Social Media
Dos
Keep It Natural: Subtle edits often look more professional.
Enhance Key Features: Highlight the subject or scenery without overdoing it.
Match Your Style: Align edits with your personal or brand aesthetic.
Don’ts
Over-Saturate: Avoid making colors look unrealistic.
Over-Sharpen: Too much sharpening can add unwanted noise.
Over-Edit Faces: Retouch minimally to keep portraits authentic.
Editing Tips for Specific Social Media Platforms
1. Instagram
Use square (1:1) or vertical (4:5) crops for maximum screen real estate.
Add text overlays for stories to engage viewers.
2. Pinterest
Vertical images perform better.
Add descriptive text to your images to drive engagement.
3. Facebook
Use high-resolution images for maximum impact.
Create albums to share multiple images from a single trip.
Conclusion
Editing travel photos for social media doesn’t have to be overwhelming. With the right tools and techniques, you can transform ordinary images into stunning visuals that resonate with your audience. Practice makes perfect, so experiment with different styles and workflows until you find what works for you.
Start editing today and let your travel photos tell stories that inspire and captivate your followers!
Travel Photo Editing Tips
How to Edit Travel Photos for Instagram
Best Photo Editing Apps for Social Media
Social Media Photography Guide
Travel Photography Editing Techniques
Travel Photo Editing Tips
How to Edit Travel Photos for Instagram
Best Photo Editing Apps for Social Media
Social Media Photography Guide
Travel Photography Editing Techniques

Post a Comment for "How to Edit Your Travel Photos for Social Media"